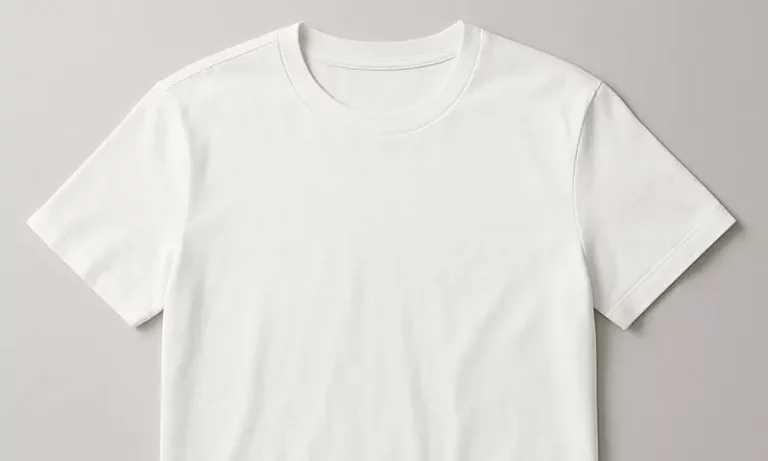
T-Shirt Size Guide Flat Lay Measurements
Finding your perfect fit is easy.

- Lay a well-fitting T-shirt flat on a surface.
- Measure across these key areas:
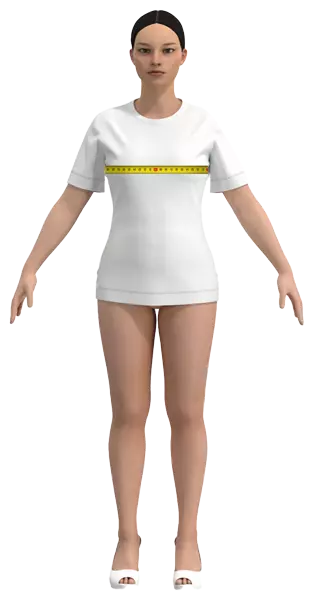
- Measure the Chest (Bust) — “A” – From armpit to armpit
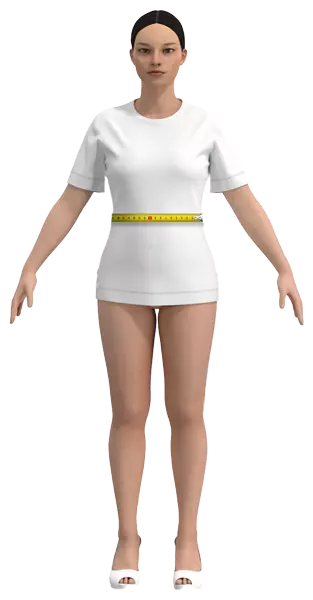
- Measure the Waist — “B” – Across the narrowest point
- Measure the Hips — “C” – Across the bottom hem
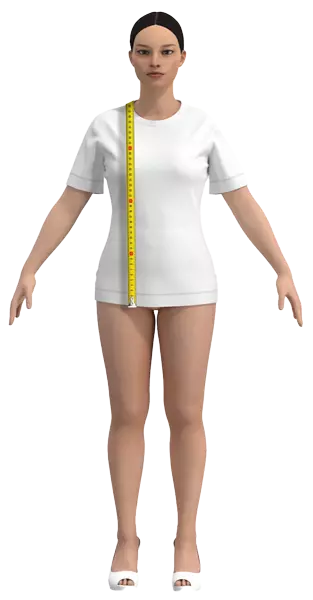
- Measure the Length — “D” – From the top of the shoulder (near the collar) to the bottom hem
- Measure the Shoulders — “E” – From one shoulder seam to the other
Model 4 – Men’s Wide Shoulders Fit (Flat Measurements)
Model 4 is tailored for broad shoulders and narrow waists.
It also fits women and kids with similar body shapes.
Please check the sizing chart for the perfect fit.
It also fits women and kids with similar body shapes.
Please check the sizing chart for the perfect fit.
| Size | Chest (Bust) — “A” | Waist — “B” | Hips — “C” | Length — “D” | Shoulders — “E” | |||||
|---|---|---|---|---|---|---|---|---|---|---|
| inches | cm | inches | cm | inches | cm | inches | cm | inches | cm | |
| 4XS | 16 1/4 | 41.27 | 15 1/4 | 38.74 | 15 1/4 | 38.74 | 26 1/2 | 67.31 | 4 | 10.16 |
| 3XS | 16 3/4 | 42.55 | 15 3/4 | 40.01 | 15 3/4 | 40.01 | 27 | 68.58 | 4 1/8 | 10.48 |
| 2XS | 17 1/4 | 43.81 | 16 1/4 | 41.28 | 16 1/4 | 41.28 | 27 1/2 | 69.85 | 4 1/4 | 10.80 |
| XS | 17 3/4 | 45.09 | 16 5/8 | 42.23 | 16 5/8 | 42.23 | 28 | 71.12 | 4 1/2 | 11.43 |
| S | 18 1/4 | 46.36 | 17 1/8 | 43.52 | 17 1/8 | 43.52 | 28 1/2 | 72.39 | 4 3/4 | 12.07 |
| M | 18 7/8 | 47.94 | 17 3/4 | 45.09 | 17 3/4 | 45.09 | 29 | 73.66 | 5 | 12.70 |
| L | 19 7/8 | 50.48 | 18 3/4 | 47.63 | 18 3/4 | 47.63 | 29 1/2 | 74.93 | 5 1/4 | 13.34 |
| XL | 20 7/8 | 53.02 | 19 3/4 | 50.17 | 19 3/4 | 50.17 | 30 | 76.2 | 5 1/2 | 13.97 |
| 2XL | 21 1/2 | 54.61 | 20 1/2 | 52.07 | 20 1/2 | 52.07 | 30 1/2 | 77.47 | 5 3/4 | 14.61 |
| 3XL | 23 | 58.42 | 22 | 55.88 | 22 | 55.88 | 31 | 78.74 | 6 | 15.24 |
| 4XL | 24 1/2 | 62.23 | 23 1/2 | 59.69 | 23 1/2 | 59.69 | 31 1/2 | 80.01 | 6 1/2 | 16.51 |